with restrictions tightening, we might as well pick up a hobby to stick with us even after going back to normal
by Ivet Koleva
During the pandemic, I’ve come to realize just how much I’ve been stuck in a mindless routine. This led me to look into new hobbies, except I’m not talking about the temporary ones, but the ones that would bring me joy to continue to grow even after things go back to normal. It’s never too late to pick up a skill, so I’ve gone ahead, went shopping, and picked out two hobbies I’m dedicating my time to during the pandemic. Obviously, money can be tight and we’re not here to break the bank. I’ve aimed for a safe route, spending enough to make these creative ideas full of possibilities but also cost-friendly.
Try out Painting
Is painting an expensive hobby? Well, it depends on your experience and what you’ll be painting. It can be a little bit difficult to start out, considering you’re overwhelmed with options on what to buy. However, it’s a hobby that brings you a form of mental therapy, allowing you to relax because whatever you make can easily be painted over or re-done.
The paint
If you’re looking to pick up painting as a hobby while at home, then get started with choosing your paint! Let’s start with looking in depth at these three choices: oil, acrylic or watercolor.
Acrylic – The Beginners Treasure
Why choose acrylic?
– Easy to clean up (all you usually need is soap and water) and super easy to work with (just dip the brush and go)
– You enjoy experimenting with different colours and landscapes.
– You may be sensitive to working with harsher solvents and chemicals found in other types of paints.
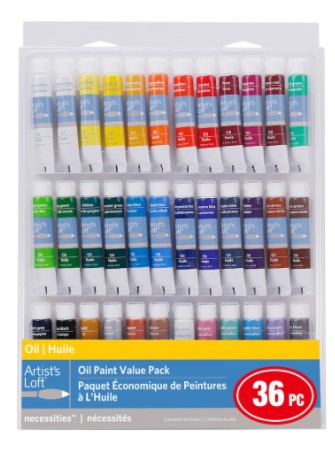
– The best for the budget: even Dollarama DecoArt ones for $1.50 do the job, and if you’re wanting something of more quality, there is an acrylic paint set offered in Michaels for $23.
Downsides of choosing acrylic:
– The paint dries fast. Once it’s dry, it won’t be responsive and it’s there to stay on your palette or canvas. However, dried paint can easily be painted over if you want to repaint or alter your choices.
– Depending on the quality of your paints, you may need to do a few extra stroke layers with your brush to get a more prominent colour.
Personally, I recommend you start with this option. It’s affordable and allows you to improve so that you can eventually work your way up to using other materials.
Oils – Professional’s Choice
Why choose Oils?
– They are flexible.
– Slower to dry, you can continue to manipulate them on your canvas for a much longer time.
– You can create beautifully deep colours.
– You can work with more types of painting techniques, such as blending, by slowing the drying time and applying paint thinners.
Disadvantages of Oils:
– The slower dryer times are both an advantage and disadvantage: sometimes you may have to wait until your paint is touch dry otherwise your brush will mix.
– The smell and odours, make sure you’re working in a well-ventilated area. This can be combated but the expenses go up.
– In general, they are not cheap.
Oil painting isn’t as complex as some may make it out to be. However, if you’re just starting out and want to simply try painting as a casual hobby, you can wait until you’ve got some experience and techniques before jumping into Oils. I personally recommend this as this is the route I took and I found myself enjoying Oil paints so much more because of it.
Watercolour – The Choice for The Patient
Watercolours can make the most beautiful of paintings, but they’re quite difficult to start with as you’re working with water and paper. There’s not so many re-do’s possible if you want to fix something, as the paper can only take so much water.
Why choose Watercolours? less damage to your brushes, easy cleanup, no chemicals, colours are brighter and shiny
Disadvantages of Watercolours:
– Requires more care for our materials – we have to be attentive to prevent leaks and cracks on the paper.
– Dull colours can be hard to achieve, and some painters prefer to use darker colours from other types of paints to make their paints appear more real.
Here, we’ll be primarily focusing on acrylic paints and their prices, as this is a just starting out guide. Truly, there are no wrong choices here – you can pick whichever paints strike your interest more. As we continue with the materials, I’ll mention what you may need for all options, but our total cost will favour acrylic paints for this article.
The canvas or the paper
Now that you’ve got your paints, let’s get started with a canvas (or paper for you fun watercolour artists).
You can tell the difference in a canvas by the tightness and thread count. Since we’re just starting out, you won’t need anything too fancy here – just a size big enough to be able to take on your landscape.
I’ve seen standard canvases ranging from CAD $25 – $78, with packs of 5 going for CAD $16 – $30.
Do you need packs of the same size? No – not unless you’re in love with the size, or your painting subjects are in constant need for those dimensions. You don’t need to run to Michaels for a $24 either, choose Dollarama instead.
Dollarama usually offers you 5 sizes of canvases (all wooden framed) to choose from: “8×10” for $1.50 – “9×12” for $2.00 – 11’ x14” for $2.50 – “12’x16” for $3.00 – “16’’x20” for $3.50
My choices were the “11’ x14” and “12’x16”, so we’ll calculate those costs into our spendings.
I do want to mention that if your choice was Oil Paints and you are choosing to save as much as you can on the canvas side, then I highly recommend priming your canvas even if they are supposedly “pre-primed”. I’ve found that the oil paint can sometimes act much like acrylics if you don’t and it dries way faster, blends much rougher and can even dull your colour noticeably. If you’ve skipped the priming and this happens, I recommend applying a thin coat of pure linseed oil and then finishing with a varnish.
If your choice was watercolours, then you’re going to be needing watercolour paper instead. In Michaels these usually range from CAD $8 – $40, and the price ranges are based on the dimensions of paper and number of sheets. Personally, I recommend starting with the Strathmore 300 Series Mixed Media Pad, which ranges from $18 for the smallest size to $40 for the largest. I tested out the $26 one I picked up (which is the price for the medium size) and it’s a great paper for just starting out.
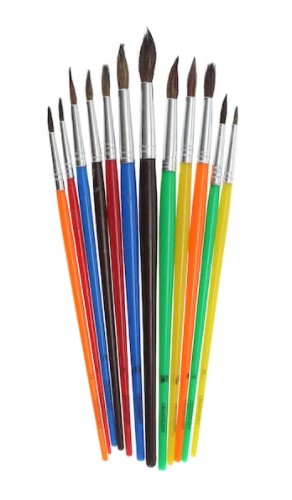
Brushes
Next up, brushes! Usually Dollarama has two types of brushes to offer – brushes for acrylic and brushes for watercolour. They usually come in a nylon package and offer brushes of various sizes inside. Getting your hands on these if you’re just starting out is pretty much all you’d need for now. The smaller brushes are great for detail work. As long as you wash them thoroughly after you’ve finished cleanup, they can actually last you for a long time. Just remember this, you can use acrylic brushes for other paints such as oils. However, brushes designed for watercolor or specifically oil are not recommended to use with acrylic paints.
Now that we’ve done our shopping for the basics, let’s breakdown the cost:
Let’s say we chose the $23 acrylic paint set from Michaels (which gives us 24 different colours) + 2.50 and $3.00 for the canvases respectively + $4.00 for the brushes = CAD $33
Not a bad cost for a trial! If this hobby is to your liking, and you can see yourself expanding on it, then that’s when you can consider growing your art kit with more supplies.
Try out Photography
Up front costs: Got a camera? $0 for now. No camera? $500
There are so many routes to take with photography, and it’s a worthwhile hobby to get into, since you’ll find yourself using it everywhere. There’s something special that this hobby has given me personally – it trained my eye to look at the details. It’s made me appreciate capturing even the littlest of things. If you decide to make photography a hobby, and get some techniques and experience, then you can even grow this idea into a side job that earns you funds to continue to invest in it.
The camera
To get started, consider a camera. You may already be photo-savvy with your smartphone, but consider making your phone your camera’s best sidekick and not the main hero. While phone photography has made leaps in technology, cameras allow you to manipulate much more elements in your photo – for example, focus or light sensitivity, to name a few.
But it doesn’t mean your phone is out of the question. I personally downloaded a Magic ViewFinder app – Canon, Nikon and Sony all offer one – and it’s completely free. It’s an app that allows you to set up a photo with your phone before you bring in your camera to take a picture. Instead of fumbling around with going through your lenses or focus, you can pull open this app, align your subject, see what settings are the best, and then adjust your camera to fit them!
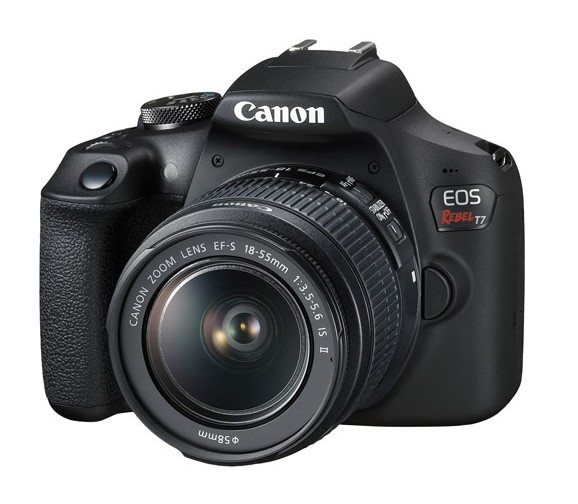
Now I say free for anyone who’s got a camera, because you can make any model work as long as it has an adjustable ISO option. If not, investing in a $500 DSLR (digital) camera (the Canon Rebel T7, for example) should be more than enough to get you started.
Start by learning common rules such as the rule of thirds, learning ISO settings, and experimenting with different angles and lighting (go from taking indoor photos to outdoor ones – it’s completely different settings!).
If you need extra guides for how to go about learning these common rules, YouTube is your best source. There are many photographers who have started channels to help new photographers start their journey.
Another option is taking a Masterclass: I personally tried the ones on LinkedIn Learning and Masterclass. While these classes have structure to them (rather than you having to search for videos on YouTube), you’ll have to pay for a subscription after your free trial. LinkedIn has a 1 month free trial, then it’s CAD $29.99. Masterclass has a seven-day free trial, then it’s CAD $20.99.
For me, I’ve honestly picked up more tips and tricks from photographers on YouTube rather than ones on a Masterclass – but it’s always nice to see how the industry famous work too, so it’s not a bad investment, if you do decide to go with it.
Also, keep your photographs. You’ll start noticing a difference soon enough between month 1 and month 4. Eventually you can start looking into more lenses for your camera and other photography gear, such as lights, lenses etc. You can also find your niche area after a few months – is photographing people your favourite? You’re probably just the right fit for Portrait photography! Do you happen to like taking photos of nature more? Continue exploring Landscape photography! Or what about structures and shapes? Architectural photography is an option!
There are many paths to photography for you to explore!
It’s easy to feel stuck and uninspired during these times. These ideas all allow you to choose your own path, while helping you relax and increase your inspiration. I recommend looking into any kind of creative hobby as we work our way into going back to normal. Since we have the time, why not emerge from lockdown with new skills learned and with hobbies that can not only bring us joy, but future creative opportunities!
